
Getting a Professional Broadcast Sound for Your Podcast
Podcasting has become a powerful way for people to connect with their audience. Today, the most popular podcasts rival the most popular television shows in audience size. In a world flooded with material for ever-shrinking attention spans, podcasts offer a chance to go deeper on a myriad of topics.
Since podcasting is an auditory medium, it’s imperative that we provide listeners with high-quality audio. Listeners simply won’t tolerate poor sound. Our goal should be to have a clean and clear recording. Fortunately, by paying attention to a few key areas, we can easily and affordably produce great sounding experiences for our audience, even if we’re not recording in a professional studio. Getting the following aspects of our podcast right will ensure great broadcast quality sound.
Probably more than any other consideration, the room in which a podcast is recorded will have a tremendous impact on the sound. While large, reverberant rooms might sound great for recording drums, it can wreak havoc on our podcast. Have you ever listened to anyone speak on a microphone in a large gymnasium? The abundance of reflective surfaces (wood floor, high ceilings, concrete walls) can cause the sound to become blurry and nearly incoherent. For our room, we want the opposite.
Find a room that is as quiet as possible and free from reflective surfaces. Make sure there are no large appliances, such as heaters or air conditioners that will produce unwanted background noise. Also, consider a room that you can be left alone in, distraction free, for extended period of time.
There should be little to no reverberation in the room; we don’t want our voice bouncing off the walls. Some of the best sound absorbers are carpeting, curtains, and furniture. You could also invest in some sound absorbing panels if necessary. The less reverberation in your room, the closer, clearer and more intimate your voice recordings will be.
Finally, and this is important, make your room comfortable. You want to be able to talk and/or have conversations without distractions. An uncomfortable chair might break your chain of thought. Poor air quality or harsh lighting can dampen the mood. Daylight from a window or soft lighting can really enhance the mood. Keep it clean. Clutter can make us feel uncomfortable. Indoor plants can help create a feeling of calm. Pictures and posters of people you admire or places you love can help create a nice vibe. There’s a reason why suspected criminals are questioned under harsh lighting, in cold hard seats, in concrete rooms. Make your podcasting environment the opposite!
The Microphone: Dynamic vs. Condenser
The next consideration is a microphone selection. It’s worth investing in a decent microphone. All of the best post-production can’t make a bad recording sound good. It’s best to get your sound right directly at the source.
You will then need to decide whether to use a dynamic or condenser microphone. Although most radio broadcasts are recorded with dynamic microphones, there are advantages to both types of microphones, depending on the situation.
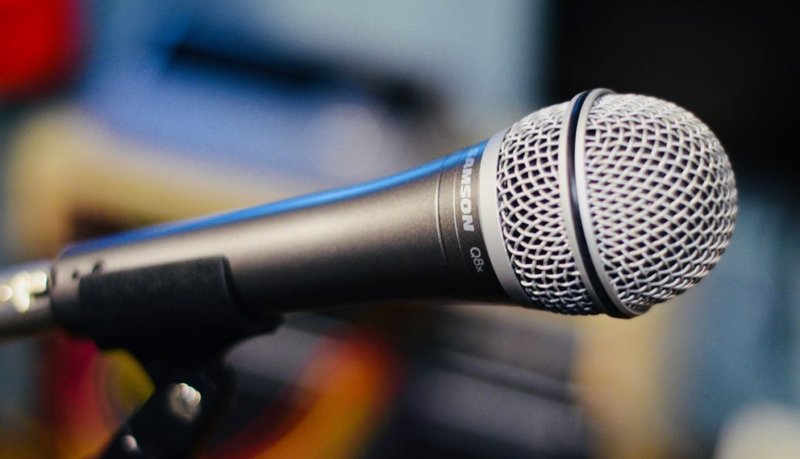
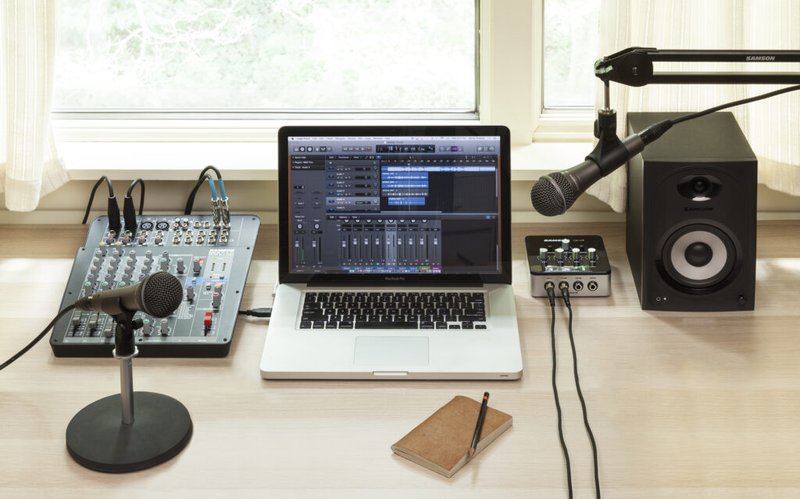
Dynamic microphones, generally, are more rugged and can withstand very high sound pressure levels, making them a popular choice for live sound. They’re usually placed close to the sound source and are not as sensitive as condenser microphones, and therefore have good sound rejection. Dynamic microphones do not require phantom power, like their condenser counterparts. In a less than perfectly quiet room, a good dynamic mic, like the Samson Q8x, will pick up a person’s voice without capturing much ambient room noise. If you are recording multiple voices, you will need one mic per person. A simple audio interface or mixer, such as the Samson MixPad MXP124FX, will be all you need for connecting to a computer.
For more in-depth information on Dynamic Microphones, see our “A Closer Look at Dynamic Microphones” articles.
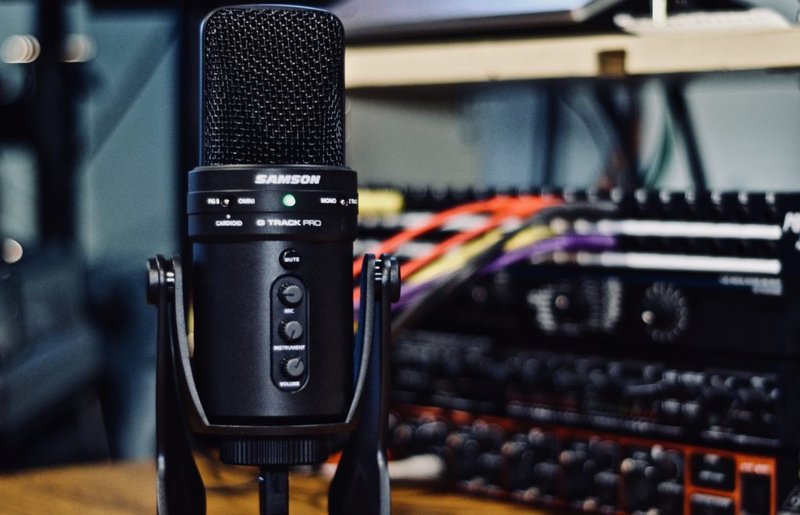
Condenser microphones are more sensitive and accurate, boasting flatter, more natural frequency responses. They require phantom power, which mixers like the Samson MixPad series offers. A condenser microphone is a bit more delicate than a dynamic microphone, which is why they are mostly found in studio situations. Condensers will usually reproduce a brighter high frequency range due to the construction of the diaphragm. And while some of the more subtle nuances of a voice will be captured, so will any ambient room noise. This means that if your room isn’t quiet, a condenser mic will pick up unwanted noise. An advantage of certain condenser microphones is that they can have multiple pickup patterns. The Samson G-Track Pro has a bi-directional pickup pattern, which allows you to set up one mic to record two people sitting across from each other.

Microphone Placement
The placement of a microphone can have a drastic impact on the sound quality. Personally, I’d rather work with a $100 microphone that is properly positioned than a $1,000 microphone in the wrong place.
Keep microphones away from anything that makes unwanted noise. Many of us record on our computers, which have fans in them. A sensitive microphone will pick this noise up. Keep some distance between your microphone and any device that makes even a small amount of noise. Experiment with the direction the mic is facing. You will notice that the tone will change quite a bit depending on the angle of the mic to the speaker’s mouth. Position mic stands so that they will not be bumped into or pick up any vibrations from the floor.
Generally speaking, a dynamic microphone should be only a couple inches from the speaker’s mouth. Be aware that unidirectional microphones exhibit a phenomenon called the proximity effect, which adds low-end bass frequencies to the voice at extremely close ranges. A condenser mic can generally be placed a bit further from the speaker, but don’t go too far as you will likely pick up room noises and the voice may sound distant if the mic is too far away.
It’s wise to invest in a windscreen, especially on condenser microphones. Windscreens can be very effective in removing harsh “s” and “p” sounds, as well as controlling any heavy breaths.
Equalizing
Avoid thinking that you will “fix it in the mix.” Instead, getting things right before and during recording will make the rest of the process much easier and negate the need for excessive EQing. When EQing our podcast, it’s best to think in terms of small adjustments in order to retain a natural sound.
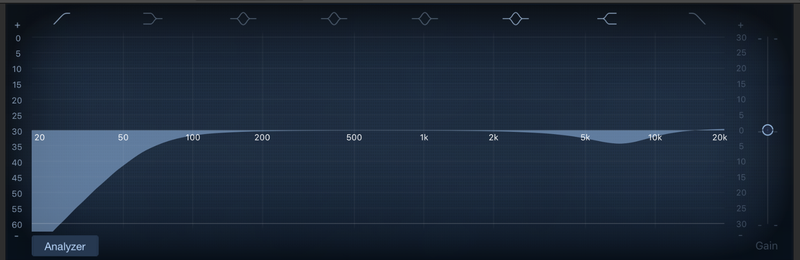
The human voice has very little useful information in the extreme low end. We can apply a high pass filter at around 80Hz to cut out frequencies in the sub bass. This can have the added benefit of reducing the all too common 60Hz hum.
If you have problems with “s” sounds, try using a bell curve to reduce frequencies 5 and 10kHz. You may also use an EQ to cut out any resonant frequencies caused by your room.
The main rule here is to keep the equalization subtle. Extreme EQing can make your voice sound unnatural. Though it may be less noticeable in the context of a densely mixed song, major equalization will be obvious on an isolated speaking voice.
Compression
Compression is essentially an automated volume control. We use it to lower the volume of the loudest parts of an audio signal. This decreases the difference between our quietest parts and our loudest parts. The difference between the loudest and quietest parts of our audio is its Dynamic Range. A Compressor is used to reduce the Dynamic Range so our audio has a more consistent volume throughout.
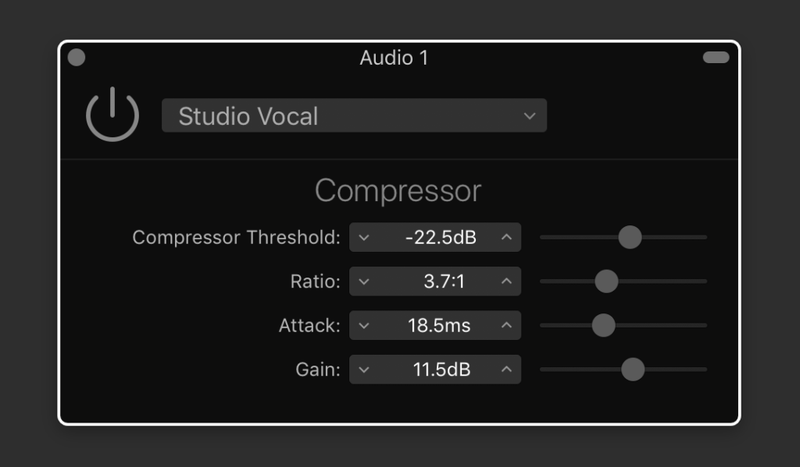
When the audio gets louder than the Threshold parameter, the Compressor reduces the volume by the Ratio. If the audio is lower than the Threshold, the Compressor does nothing. The speed at which the Compressor turns the volume down (or applies Gain Reduction) is determined by the Attack. The speed at which the Compressor returns the volume to normal is the determined by the Release.
Here’s a practical analogy. If you are listening to music and a part gets too loud (or goes above your “Threshold”), you turn it down. When the music goes back to your normal listening volume (or below your “Threshold”) you return the volume to where it was originally. A Compressor is doing this, except at a much faster rate than a person with a volume control.
Let’s imagine the Threshold is -6db, the Ratio is 2:1, the Attack is 10ms, and the Release is 50ms. When our audio goes 2db over the Threshold of -6db, the Compressor will turn the audio down 1db within 10ms. After the audio drops below the Threshold, the Compressor will return the volume to normal within 50ms.
For our podcast we only want the Compressor turning down the volume (or applying Gain Reduction) on the loudest parts of the conversation. A voice with too much compression will sound unnatural. Set the Threshold so that the audio only surpasses it occasionally. The Ratio should be set somewhere between 2:1 and 5:1. Fast Attack and Release times are best for voice because its volume can change rapidly.
As a general rule, I like to set my compressor so that I can clearly hear its effect on my audio. Then I reduce it until it is more transparent and barely noticeable. Remember, we are used to hearing voices without compression; so don’t over do it!
Gating and Noise Reduction
If there is a lot of background noise, it may be necessary to use a Gate and/or Noise Reduction plugin.
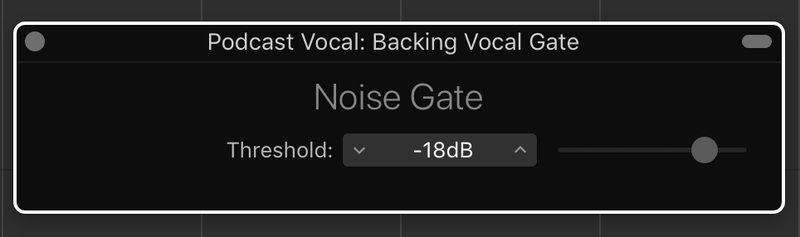
A Gate works by only allowing audio that is above a certain volume to pass through. Think of it like an automated mute button. It can be very effective for removing subtle hiss and hum while a person is not talking.
If we set the Threshold of the Gate to -20db, then the Gate will only allow audio to pass through if that audio is louder than -20db. The Attack and Release parameters on a Gate determine how fast the gate “opens” to allow audio through, and how fast the gate “closes” to mute audio below the Threshold. Use as fast an Attack as possible, so you catch the beginning of every word. The Release should be slow enough to capture soft endings to words without cutting them off.
Keep in mind that a Gate does not remove unwanted noises from an audio signal, it just mutes those unwanted noises while the person is not speaking. To remove the noise, you may want to invest in some kind of noise reduction software. Noise reduction software can “learn” the offending background noise frequencies and remove them from your audio. There is often a little bit of a trade off, as removing those frequencies can sometimes remove similar frequencies from the voice. Use with care! Ideally, you won’t need any noise reduction because your room is quiet and you have a quality microphone that is placed properly.
It may sound like a lot of steps, but once you have treated your room, obtained a good microphone, and found decent settings for any post processing (EQ, Compressor, Gate, etc.), save your settings in a default project in your DAW. Every time you begin a new podcast, everything will already be set up and you can get right to work.