
Sound Tips for the Jazz Band Director: Microphone guidelines for performance, recording and broadcast.

Matt Vanacoro
As a jazz band director, you’re expected to lead and inspire your musicians to achieve the best possible performance. And with advancements in audio technology (and sometimes a lack of assistance), you may also be required to play the role of a sound engineer. This can include mic’ing a rehearsal, producing a studio recording or live streaming a concert.
Fortunately, you can now meet all these challenges with some basic technical know-how and audio equipment. The following “cheat sheet” walks you through some simple techniques on how to properly mic and EQ each instrument to get the best possible sound for your jazz band ensemble.
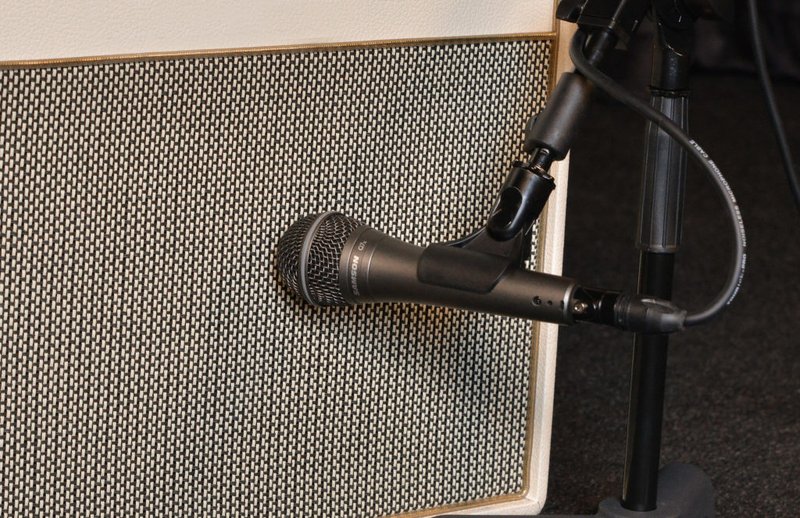
Mic’ing the Guitar Amp
Best practices call for using a microphone to capture the guitar amp, allowing the sound engineer to control the level of the guitar in relation to the other instruments. The amp itself becomes the guitarist’s on-stage monitor, helping to keep the overall stage volume at a manageable level.
Tips & Techniques:
Use a single unidirectional dynamic mic, applied to only one speaker, to avoid phase cancellation issues. Place the microphone so that it is nearly touching (and perpendicular to) the grille cloth. Keep the head of the microphone about half way between the edge of the speaker and the center to capture the fullest sound; do not place the microphone directly in line with the center of the speaker. Choose a mic with a wide dynamic range to avoid overloads; a super-cardioid pickup pattern provides greater rejection of other on-stage sounds.
Applying EQ:
- Below 80Hz: 80Hz is lowest string on the guitar, so cut everything below this to minimize rumble.
• 80Hz–320Hz: This range carries the fundamental tones; the “meat” of the instrument. Boost or cut accordingly.
• 2kHz–3kHz: Boosting this range may provide more tone and can emphasize the pick attack, but can also add harshness.
• 5kHz–10kHz: Any added overdrive/distortion will favor this range. Too much boost here can produce a very shrill tone.
• Above 10kHz: Above 10kHz, there is little sonic activity to preserve, so cut accordingly.

Methods for Bass Mic’ing
Mic’ing up the electric bass cabinet is nearly identical to mic’ing up a guitar cabinet – but you may not need to. Unlike guitarists, most bassists do not rely on their speaker cabinet to provide polish to their sound. Most modern bass amps feature a direct line output that can feed the signal to the house mixer or console. If there is no line output, a direct box maybe used instead. Using a microphone to capture the sound of an acoustic upright bass is a different matter.
Tips & Techniques
On the upright bass, the temptation is to aim the mic at one of the ƒ holes on the body, but more tone is available by directing a single directional dynamic microphone to the bridge itself. Place the microphone a few inches off the strings, aiming at the bridge and beyond to the surface of the instrument. Be sure to position the microphone in a way as to not interfere with the performer.
Applying EQ:
• 40–200Hz: This frequency range contains the fundamental tones of the individual bass strings
• 200–800Hz: Here is where you will find the prominent overtones for the bass. Boost or cut accordingly.
• 300–500Hz: Boosting this narrow subset of the above range can add a distinctive “woody” tone.
• 800Hz–16kHz: The growl, attack, and pluck tones available to the bassist lie in this range. Boost for an aggressive tone.
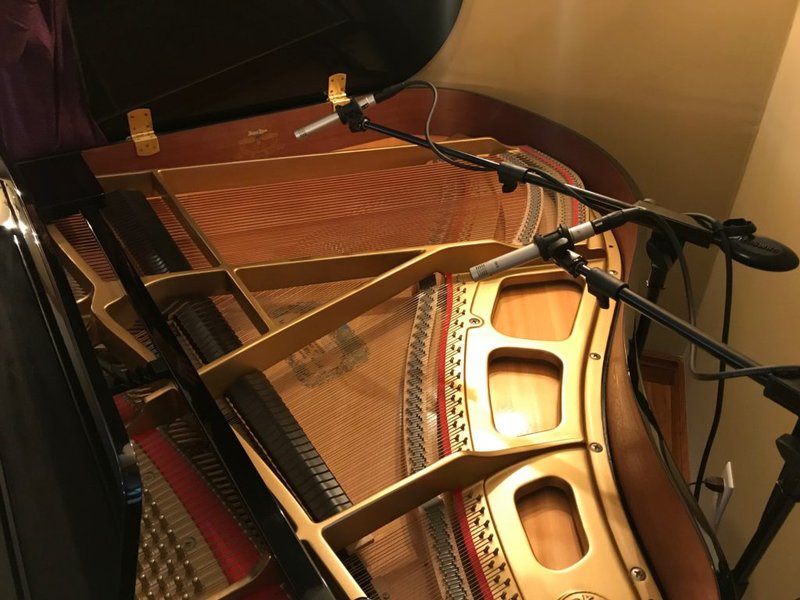
Capturing the Grand Piano
We don’t hear piano as a single-point source as we do an alto sax, say. And without adequate mic’ing, the pianist must constantly play with ƒƒƒ dynamics, just to be heard at all. Using a matched pair of highly-directional condenser microphones can preserve the stereo imaging of the piano while conveying all of the performer’s expression, as well as minimizing feedback.
Tips & Techniques:
Use a pair of pencil condenser microphones designed with small diaphragms to deliver a smooth and even response. Begin by placing both microphones about 8–10″ behind the string dampers, with the pickup ends facing front. The mic heads should be roughly eight inches above the strings. Avoid positioning the mics perpendicular to the strings; instead, angle the microphones between 45–85° to achieve the best balance of hammer strike and string tone. The microphones themselves should be a few feet apart, and don’t be afraid to have the pickup areas overlap.
Applying EQ
- Below 200Hz: Lowering some of these frequencies can leave more room in the mix for the kick drum and bass guitar.
• 200Hz–1kHz: Here are the fundamental tones for “vamping” or chording. Too much boost here can muddy the sound.
• 1kHz–6kHz: Adding boost here can add more presence, but may overpower the sound of the guitarist.
• 6kHz–8kHz: When soloing, adding boost here can help make each note distinct, rising slightly above the mix.
• Above 8kHz: Above 8kHz, the piano sound can become quite “plinky” and harsh.
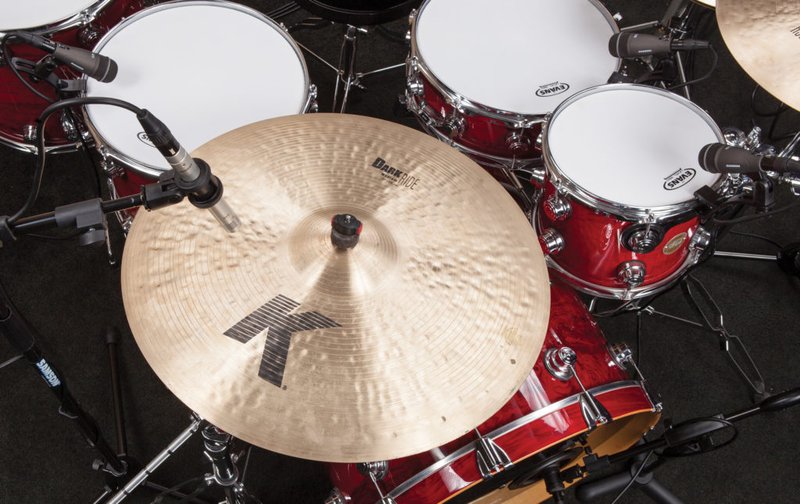
Drum Mic Basics
The drummer must be heard so that the entire band can play with confidence. The challenges of mic’ing a drum set include how many drums to mic, mounting the mics, and withstanding the enormous dynamic transients. Plus, the drums, cymbals, and kick drum each call for a specialized type of mics. Drum mics are often sold in convenient pre-packaged kits.
Tips & Techniques:
Two microphones (kick + snare) is the minimum. A large diaphragm dynamic mic is best for the kick drum, placed directly in front of the drum head on the non-beater side. Often, this head will have a pre-cut hole designed for optimum mic placement. For the snare drum – and toms – choose a unidirectional dynamic microphone positioned very close to the batter head. Tension rim clamps help hold the microphone nearly perpendicular to the edge of the head (angled in slightly) so as not to impede the drummer’s playing. Add the same type of directional dynamic mics to any additional toms – floor or mounted. Use a directional condenser mic for the hi-hat cymbal. One of the simplest ways to capture crash and ride cymbals is to use a pair of overhead cardioid condenser microphones, angled in to curtail their pickup area.
Applying EQ:
- Kick Drum: The fundamental tone occurs between 60–80Hz; the beater strike occurs closer to around 4kHz
• Snare Drum: The tone of the drum is centered around 240Hz; the crispness of the snares and the stick are closer to 5kHz.
• Toms: Based on size and tuning, the tone of a tom ranges from 120–250Hz, the strike is closer to 5kHz.
• Cymbals/Hi-Hats: The shimmer and sizzle of the cymbals is based around 6kHz up to 10kHz.
The strike and the metallic tones appear at about 200Hz.
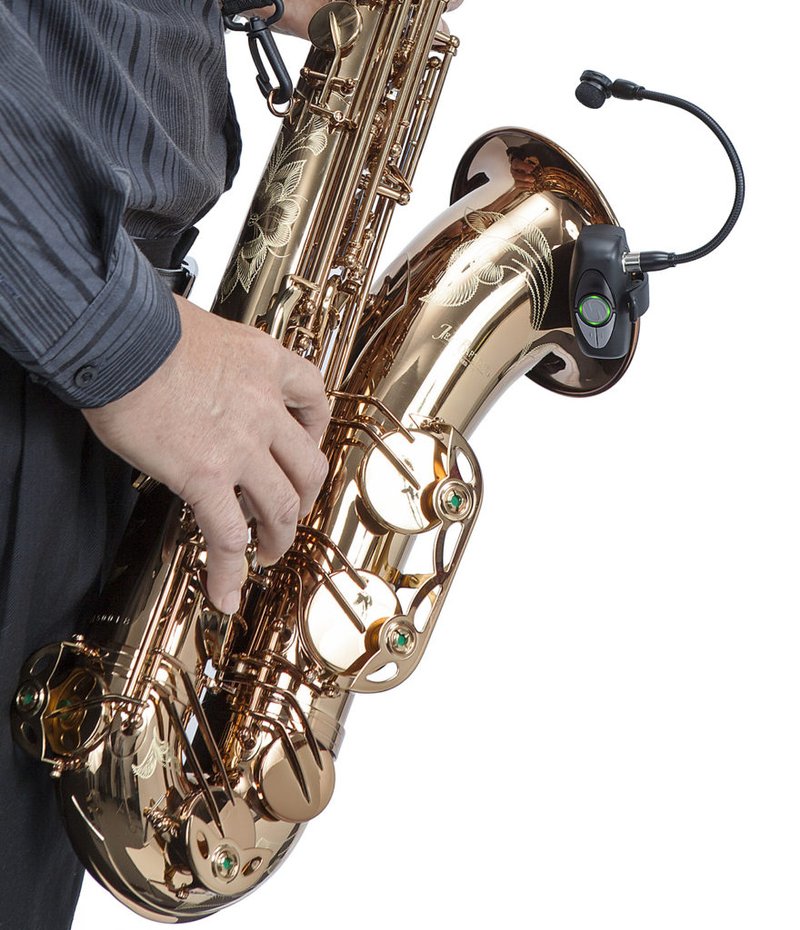
How to Mic a Horn
In the earliest of stage bands, a couple of microphones were placed in each row to capture the ensemble sound, while allowing individuals to easily approach one of these mics for their featured solo. This technique is still common today. The trick is to have the performer “play to the microphone” to achieve the best possible tone. Position the mic so that it is pointed into the bell of the horn. The performer should keep the bell of the instrument about six to ten inches from the microphone. Moving the instrument slightly off axis may produce a smoother tone with less wind and valve noise – but be aware that the volume may drop when moving too far aside of a directional mic.
Tips & Techniques:
A better solution may be a compact wireless microphone clipped to the horn, offering mobility and expression for the featured brass or woodwind soloist while removing unsightly and cumbersome wiring from the stage area. Wireless systems for the horn resemble a modified clip-on lavalier-style element that quickly mounts to the bell; the clip on mic/transmitter can be moved from instrument to instrument in seconds.
Applying EQ:
Although they cover different ranges, the baritone, tenor, alto, and soprano saxes contain similar harmonic components. Similarly, trumpet and trombone also have common components pitched at different frequencies.
• Sax Fundamental: The root “Honk” tone of the saxophone falls somewhere in the 300–500Hz range.
• Sax Overtones: The overtone “Squawk” created by keying, wind pressure, and embouchure are focused around 1000–2500Hz. Cut these back to produce a warmer tone, increase them to add more clarity and presence.
• Brass Warmth: The frequencies around 200–450Hz provide a brass instrument with its warmth;
too much added here can muddy the sound.
• Brass Body: The 1–5kHz range is where you would add frequencies to brighten the tone and add more body.
• Brass Rasp: Finally, the raspy edges of the brass instrument’s tone, show up between the 5–8kHz range.
Learn about Samson’s full line of audio solutions for jazz band rehearsal, performance and recording below:
Q8x and Q7x dynamic microphones
C02 pencil condenser microphones
Drum microphones
AWX Wind Instrument wireless system
Mixers
Direct Boxes
Microphone stands
Microphone cables
About the Author